Project on wall or ceiling
The Qwiek.up can project on both the wall and the ceiling. You can adjust the desired projection angle by tilting the Qwiek.up either forward or upward. To set the angle, it is best to hold the sides of the Qwiek.up and rotate it in the desired direction. This prevents you from touching the lens with your hands, which could damage it.

Adjusting the projection angle
If your Qwiek.up is not staying in the correct angle, you can adjust it yourself (if your Qwiek.up has 2 screws on each side). If your Qwiek.up has a lever or only 1 screw on each side and you want to adjust the tilt mechanism, please contact our support department via our Jackbot at the bottom right of the screen.
If your Qwiek.up has a lever or only one screw on each side and you want to adjust the tilt mechanism, please reach out to our support department through our Jackbot located at the bottom right of the screen.
Tools
Allen wrench 2.5 mm
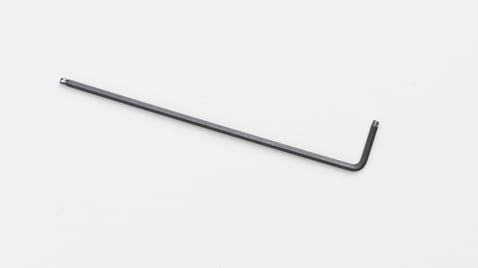

Tighten the 4 screws on the outer sides of the Qwiek.up (2 screws on each side) using a 2.5 mm Allen wrench. Always tighten both screws on each side and then check if your Qwiek.up tilts to your desired angle.

Caution! Never loosen the screws too much. This can cause the top part of your Qwiek.up to come loose and fall, resulting in permanent damage to your Qwiek.up.
If you need assistance, please reach out to the technical department of your healthcare organization.
Adjusting the image focus
You can adjust the image focus of the Qwiek.up by using the white slide located directly below the lamp.

Screen correction

Caution! Please note that this function only works on the home screen (when no experience module is inserted).
The Qwiek.up has a built-in correction feature that automatically projects the image correctly. This correction is called keystone. However, it may be desirable to manually adjust the image. To do this, press and hold the round button (6) on the control panel and adjust the keystone using the plus (4) and minus (5) buttons.